


Installing a carport is not simply about placing a structure to protect vehicles from sun, rain, or hail. When it comes to a photovoltaic carport structure, the process requires a detailed technical analysis to ensure structural safety, durability, and maximum efficiency.
The development of these solutions is based on rigorous technical criteria. Throughout each stage of the project, all necessary aspects are evaluated to prepare a safe design adapted to the specific environmental conditions.
Below are the key points that Enstall, as a manufacturer, considers during the design and installation process.
1. Project location and layout
Everything starts with the exact location of the project. It is essential to know:
- The precise location (coordinates or reference in Google Maps).
- The parking layout or distribution.
- The arrangement of the solar panels.
- The size and number of modules.
With this information, Enstall can select the canopy model that best fits the available space and maximizes photovoltaic production. Through their SunferKey tool, you can create your project with geolocation to simplify the installation process and obtain a final list with all the necessary information.
Additionally, at a more technical level, the following aspects must also be analyzed:
- The environmental aggressiveness (for example, proximity to the sea).
- The slope of the terrain. If the inclination is equal to or greater than 2%, a special project is required to guarantee structural stability.
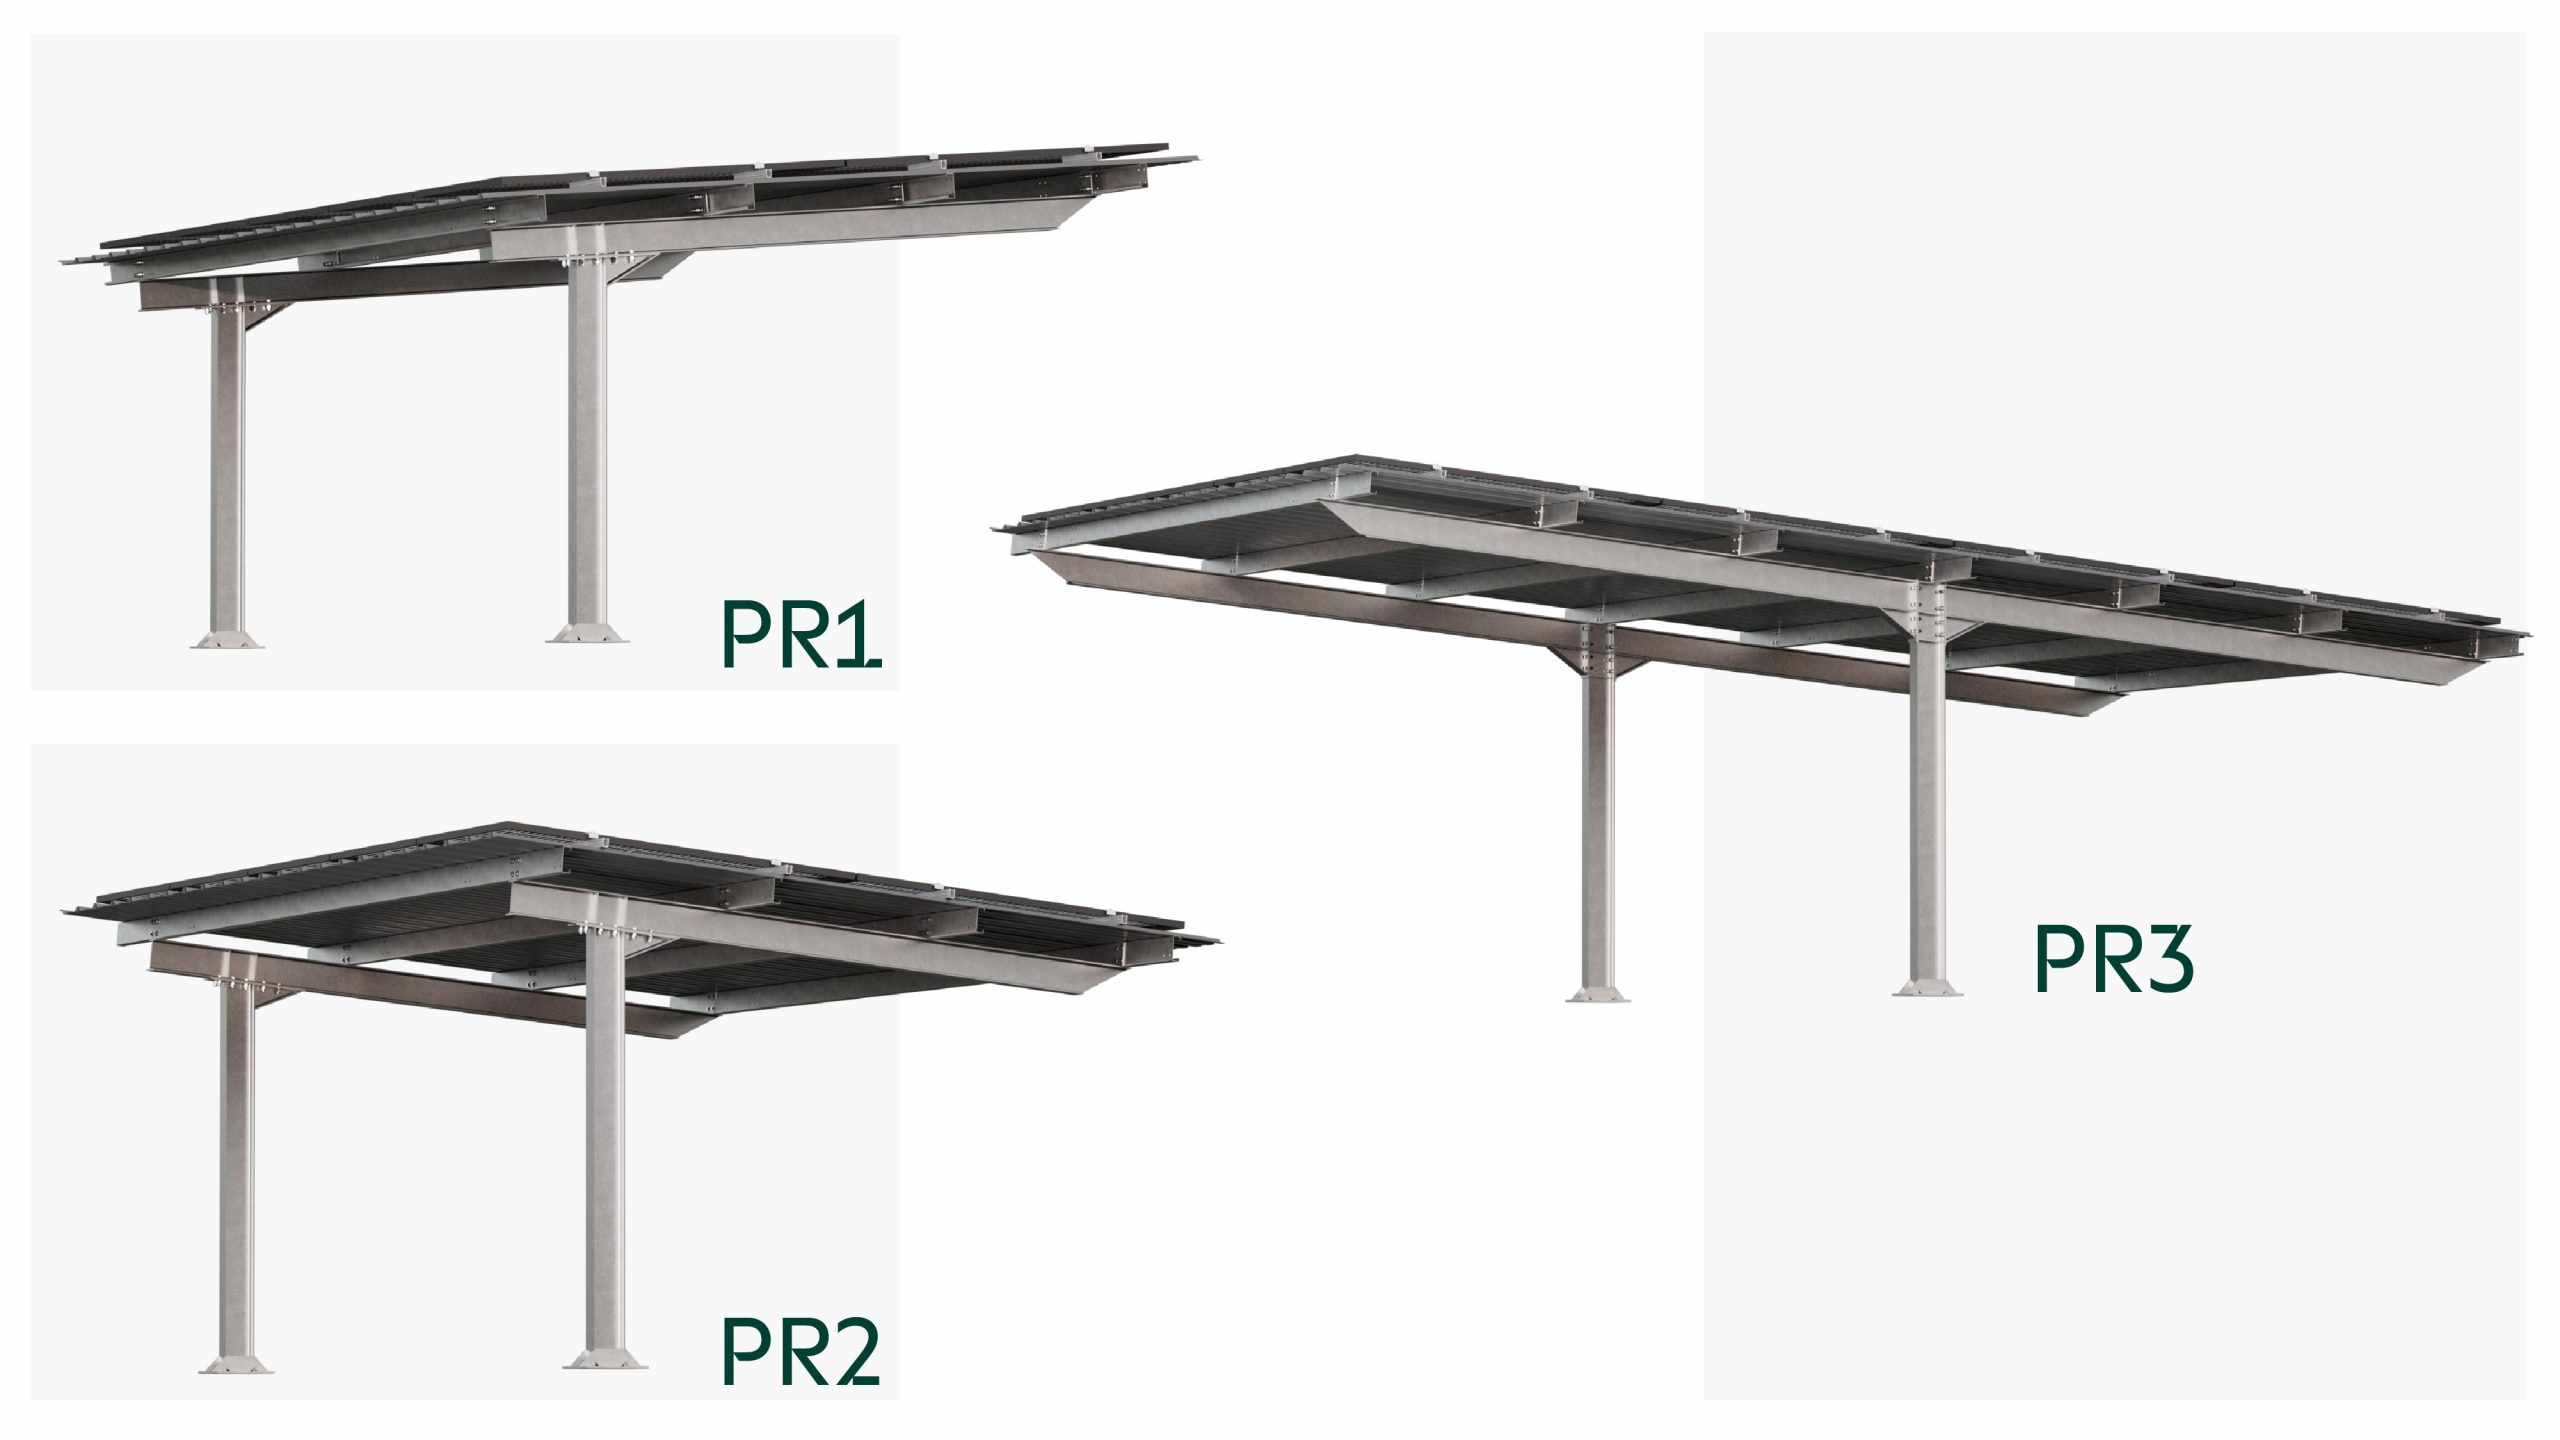
2. Selection of the carport type
Not all carports are the same. Choosing the right model depends on the geometry of the space and the distribution of parking spaces, lanes, and access points.
Enstall offers standard models such as:
- PR1
- PR2
- PR3
They also develop special models for large-scale projects.
When defining the typology, aspects such as the following are considered:
- Clear or standard height.
- Tilt angle (generally 5°, but it can reach up to 10° in special cases).
- Distance between frames.
- Number of parking spaces.
- Type of finish (galvanized or lacquered).
- Environmental conditions (corrosive environments).
The type of roof is also defined:
- With sheet metal.
- Without sheet metal, using aluminum profiles to fix the panels to the main structure. In this case, there is always a 2 cm gap between panels, so it is not waterproof.
- Panel layout in landscape (horizontal) or portrait (vertical).
- Without sheet metal using the Watertight system.
3. Load criteria for the photovoltaic system
Structural safety is one of the most critical aspects of any installation.
In its projects, Enstall calculates:
- The self-weight of the photovoltaic panels and the structure required to fix them to the canopy.
- Wind loads.
- Snow loads (if applicable).
- Operational loads.
In addition, safety factors are applied according to local and international standards such as Eurocode or ASCE 7.
To ensure compliance, a structural technical evaluation is performed using specialized software. This analysis allows:
- Verification that the structure can withstand the expected loads.
- Simulations and stress calculations.
- The issuance of a technical report with recommendations and possible limitations.
If necessary, structural reinforcements are designed before installing the photovoltaic system.
4. Foundations: the base of the entire system
Before installing the canopy, a geotechnical study must be carried out in accordance with the Spanish Technical Building Code (CTE), established in Royal Decree 314/2006.
Based on the results of the study, the following are calculated:
- The dimensions of the footings.
- The required steel reinforcement.
Afterwards, the location of the footings, columns, and anchor plates is marked out on site. A blinding concrete layer is executed, the reinforcements are placed, and the anchor plates are installed, ensuring they remain perfectly level.
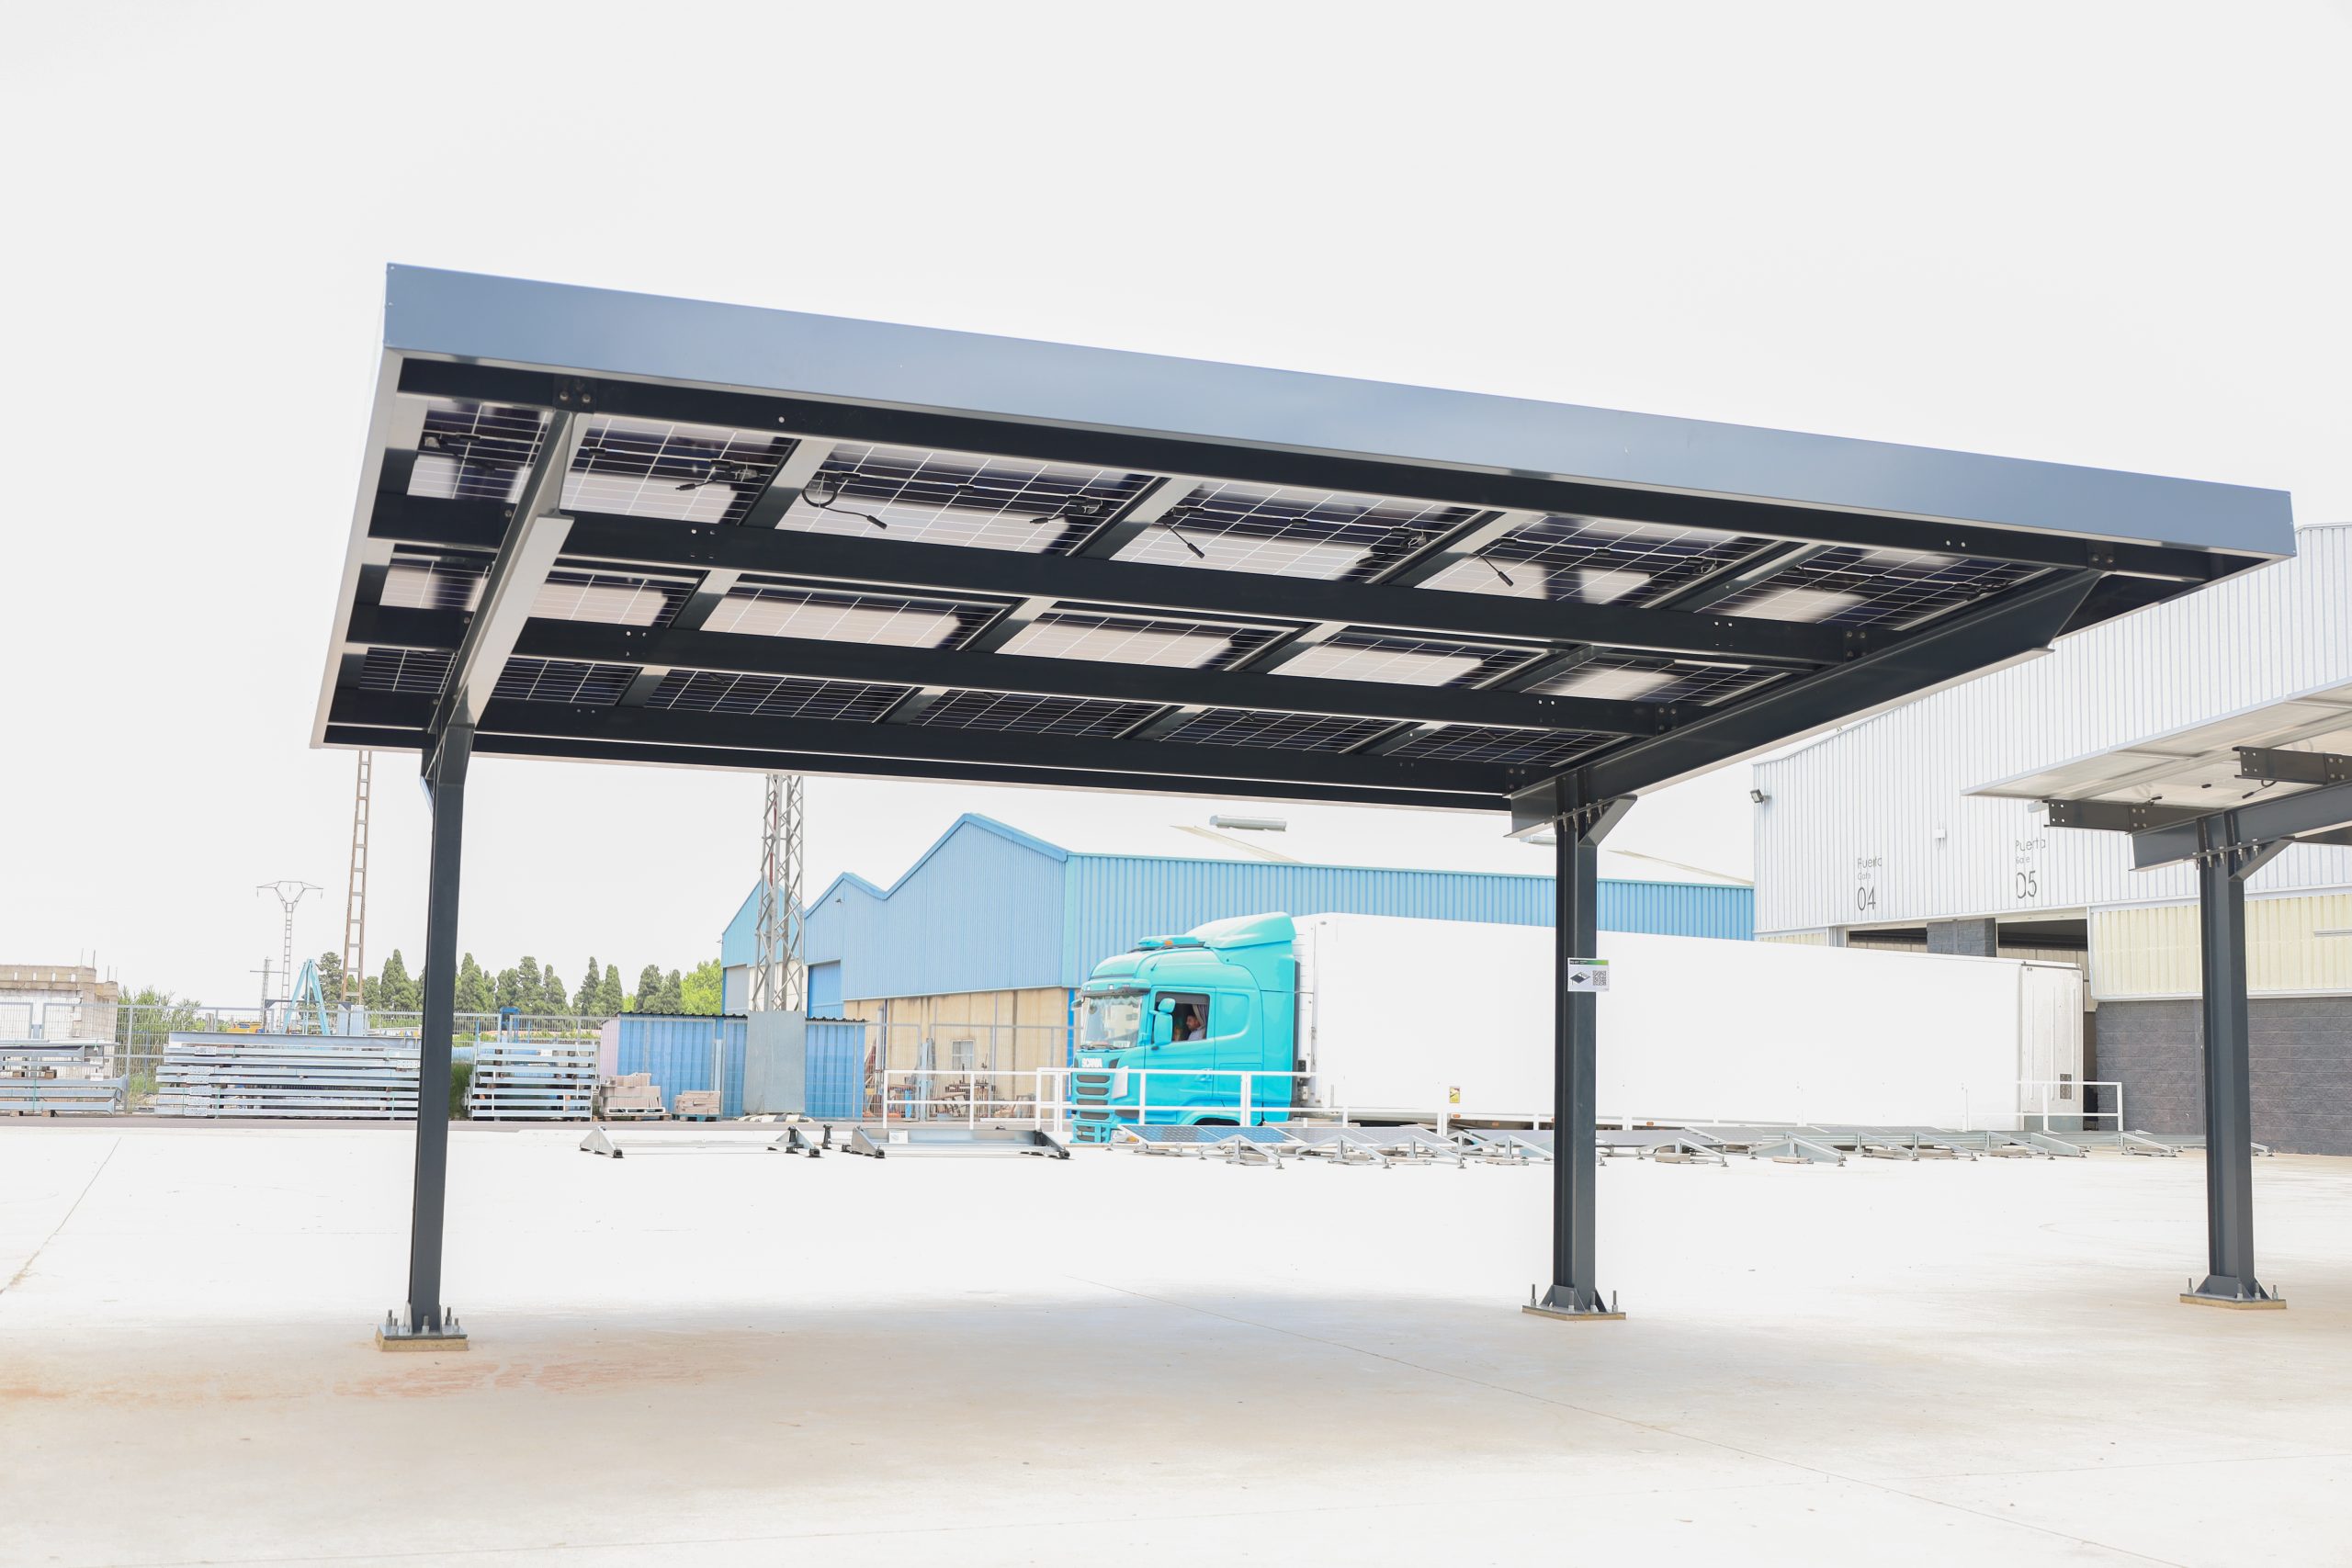
5. Installation process
While the foundations are being executed, the frames (columns and beams) can be assembled.
Once the concrete has reached its characteristic strength — verified through tests or after 28 days of curing — the frames are installed onto the anchor plates.
After that:
- The alignment and leveling of the structure are verified.
- If a leveling gap has been left between the anchor plate and the foundation, it is filled with structural expansive mortar.
- Bracing and temporary supports are installed to prevent movement.
- Purlins are installed.
- Sheet metal (if applicable) or support profiles are installed.
- Finally, the photovoltaic modules are installed.
Each stage is essential to avoid structural stress and ensure the durability of the system. In addition, all steps are described in the assembly manuals that Enstall provides for its models.
As you can see, a solar carport is much more than a vehicle shelter: it is an energy infrastructure that must be designed with technical precision.
Enstall approaches each project through a complete structural analysis, regulatory compliance, and strict control at every stage of installation, ensuring the structure is safe, functional, and adapted to real environmental conditions.
The result is a robust, efficient solution designed to maximize photovoltaic performance over the long term.
Are you planning a solar carport project? We support you through every stage of the design process.
